Table of Contents
ToggleShopping for a kitchen island shouldn’t feel like navigating a warehouse blindfolded, but Home Depot’s selection can be overwhelming. With hundreds of options ranging from $200 portable carts to $3,000 built-in units, narrowing down the right island for your kitchen requires more than just scrolling past thumbnails. Whether you’re adding prep space to a cramped galley kitchen or anchoring an open-concept remodel, understanding what Home Depot stocks, and what actually works in your space, makes the difference between a functional upgrade and an expensive obstacle. This guide walks through the practical side of choosing, sizing, and installing a kitchen island from Home Depot’s current lineup.
Key Takeaways
- A Home Depot kitchen island offers quick availability and affordability, with prices ranging from $200 for portable models to $3,500 for premium built-in units, backed by a 90-day return policy.
- Portable islands work best for renters and small spaces, while stationary kitchen islands require floor anchoring and professional installation for electrical outlets or plumbing features.
- Proper measurements using painter’s tape and maintaining 42–54 inches of clearance around your island ensures functional traffic flow and prevents obstruction of appliance doors and work zones.
- Drawer construction quality matters: prioritize dovetail joinery, soft-close hinges, and ball-bearing slides over budget alternatives that fail under repeated use.
- Countertop material significantly impacts durability and cost—laminate is affordable but chips easily, while quartz and granite add $300–$800 but resist scratches and heat damage.
- Anchoring stationary islands with L-brackets, hurricane ties, and construction adhesive prevents tipping and is essential for homes with children or heavy cooking equipment.
Why Choose a Kitchen Island from Home Depot?
Home Depot offers a middle ground that specialty kitchen stores and big-box competitors often miss: immediate availability paired with enough variety to fit most budgets and floor plans. Unlike custom cabinetry that takes weeks for delivery and installation, many Home Depot islands are in-stock or available for next-day delivery, which matters when you’re midway through a kitchen refresh.
The pricing structure is straightforward. Portable islands start around $200 to $600 for basic butcher block or laminate models. Mid-range stationary islands with built-in storage and seating run $800 to $1,800. Premium options with granite tops, dovetail drawers, and hardwood construction hit $2,000 to $3,500. These prices reflect typical market rates as of early 2026, though regional differences and sales can shift numbers by 10-15%.
Home Depot also stocks brands that balance cost and durability, Hampton Bay, StyleWell, and Home Decorators Collection dominate the mid-tier. For contractors or DIYers planning custom builds, Home Depot carries unfinished base cabinets and countertop materials separately, allowing for a semi-custom island at a fraction of specialty shop costs.
Return policies matter here. Home Depot’s 90-day return window for most furniture gives homeowners time to test fit and function before committing, unlike many online-only retailers with restocking fees and complex return logistics.
Types of Kitchen Islands Available at Home Depot
Home Depot’s kitchen island inventory breaks into two broad categories, each with distinct use cases and installation requirements.
Portable and Rolling Kitchen Islands
These are the workhorses for renters, small kitchens, and anyone who wants flexibility without anchoring hardware to the floor. Locking casters are non-negotiable, cheap wheels will drift during chopping or dough rolling, creating a safety hazard. Look for models with at least two locking wheels positioned diagonally for stability.
Materials range from butcher block tops (ideal for prep work, requires regular oiling with food-safe mineral oil) to stainless steel (commercial-grade durability, shows fingerprints) and laminate (budget-friendly but prone to scratching). Portable islands typically measure 24 to 36 inches wide and 36 inches tall to match standard counter height.
Storage configurations vary. Some models feature open shelving, which works for frequently used items but collects dust. Others offer enclosed cabinets or pull-out drawers, check for dovetail joinery in drawers rather than stapled construction, which fails under repeated use. Many homeowners appreciate the design flexibility that portable kitchen solutions provide when working with limited square footage.
Portable islands rarely support electrical outlets or plumbing hookups, limiting their function to prep and storage. They’re also not rated for structural loads like hanging pot racks or heavy-duty mixers without reinforcement.
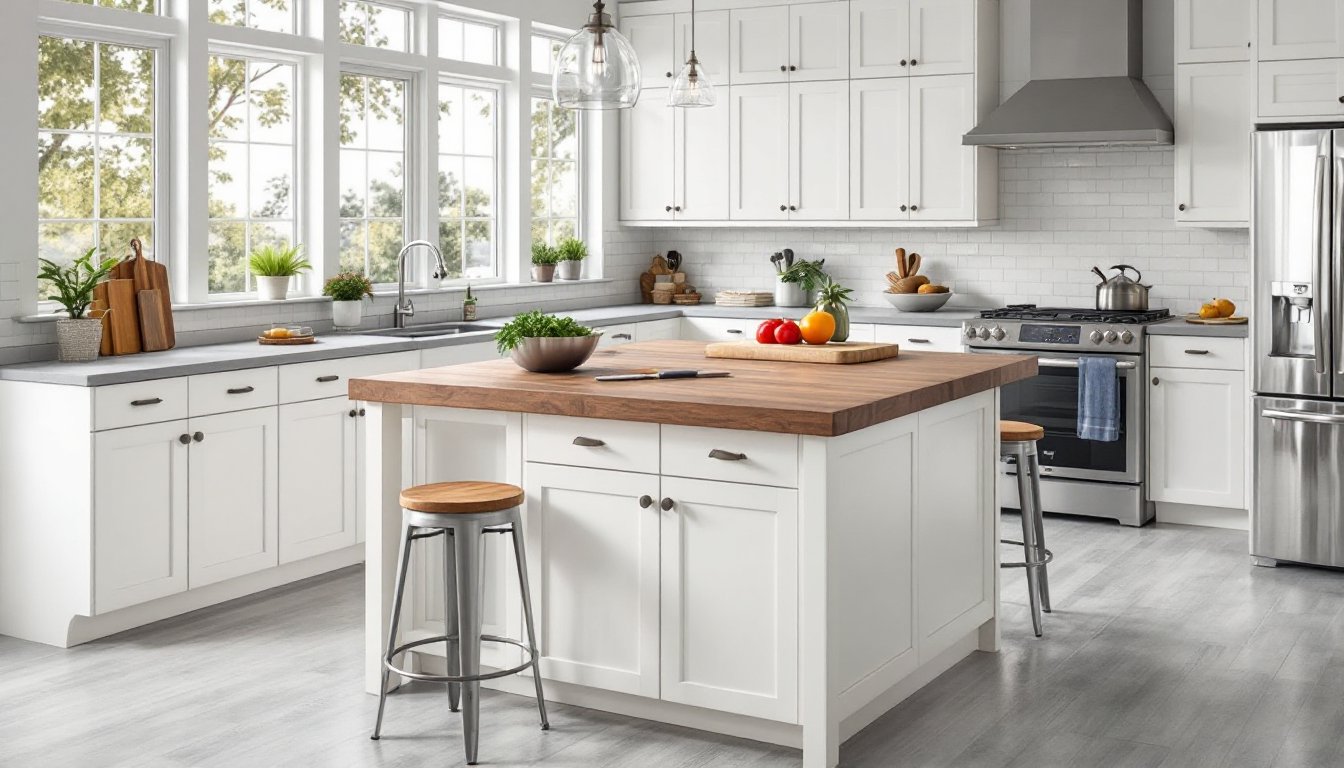
Stationary and Built-In Kitchen Islands
Stationary islands are essentially pre-assembled cabinet units, sometimes called “kitchen island cabinets.” These ship as single pieces or modular sections and require anchoring to the floor, though installation is simpler than full custom cabinetry. Most models at Home Depot include leveling legs to accommodate uneven floors, critical in older homes where subfloors settle over time.
Countertop materials separate budget from premium models. Laminate keeps costs down but chips easily at edges. Solid wood (typically oak or acacia) offers warmth but requires sealing against water damage. Quartz and granite tops add $300 to $800 to the base price but deliver scratch and heat resistance that matters near cooktops or heavy prep areas.
Built-in options at Home Depot often include overhang seating on one side, look for at least 12 to 15 inches of overhang to accommodate standard counter-height stools without knee interference. Structural support for overhangs longer than 12 inches typically requires corbels or metal brackets rated for the countertop material.
Electrical and plumbing integration is where stationary islands get complicated. Installing outlets requires running conduit through the floor or walls, which must meet National Electrical Code (NEC) standards, specifically, islands need at least one receptacle if the countertop has a long dimension of 24 inches or greater and a short dimension of 12 inches or greater. Plumbing for a sink or dishwasher demands venting and drainage that often require cutting into the subfloor. Both scenarios likely require permits in most jurisdictions, and DIYers without electrical or plumbing experience should budget for licensed professionals.
Key Features to Consider When Shopping
Walking the aisle or browsing online, certain features separate functional islands from regrettable purchases.
Countertop height and thickness should match existing counters, standard is 36 inches from floor to surface. Bar-height islands at 42 inches work for homes with tall ceilings and bar stools, but they’re less practical for food prep. Countertop thickness varies from 1 inch (laminate) to 1.5 inches (butcher block) to 3 inches (edge-grain or decorative profiles). Thicker tops add visual weight but cost more.
Storage configuration depends on what you’re storing. Deep drawers (8 inches or more) suit pots and mixing bowls. Shallow drawers (4 to 6 inches) handle utensils and linens. Open shelving on the backside of an island works for cookbooks or decorative items but creates clutter visibility from the living area in open-concept layouts.
Material quality shows in joinery and hardware. Dovetail or mortise-and-tenon drawer construction outlasts stapled or cam-lock assemblies. Soft-close hinges and ball-bearing drawer slides are worth the upgrade, they prevent slamming and support heavier loads. Avoid particleboard cabinet boxes in humid climates: plywood construction resists moisture and holds fasteners better over time.
Finish durability matters in high-traffic kitchens. Painted finishes require touch-ups after dings. Stained wood shows water rings unless sealed properly. For busy households, consider the curated examples of durable finishes highlighted in design showcases that emphasize longevity alongside aesthetics.
Weight capacity is listed in product specs but rarely questioned until a countertop cracks. Portable islands with thin legs or particleboard frames can’t support more than 50 to 75 pounds of sustained weight. Stationary units with reinforced cabinet boxes handle 200+ pounds, but always verify specs if mounting heavy equipment or loading cabinets with stoneware and appliances.
How to Measure Your Kitchen for the Right Island Size
Guessing dimensions leads to blocking traffic lanes or creating awkward dead zones. Measure twice, order once.
Start by mapping your kitchen work triangle, the path between sink, stove, and refrigerator. Islands should enhance this flow, not obstruct it. The general rule: maintain at least 42 to 48 inches of clearance on all sides of the island for single-cook households. Bump that to 48 to 54 inches if multiple people use the kitchen simultaneously.
Use painter’s tape on the floor to outline the island’s footprint before buying. Live with the taped outline for a few days. Open cabinet doors, dishwasher, and oven while navigating around the outline, you’ll quickly find if the island intrudes on traffic or appliance swing radius.
Ceiling height affects visual proportion. Low ceilings (under 8 feet) make large islands feel cramped. If adding pendant lighting, account for 30 to 36 inches of clearance between the countertop and the bottom of the light fixture to avoid head collisions.
For seating, calculate 24 inches of width per person along the overhang. A 48-inch-wide island comfortably seats two: a 72-inch model fits three. Depth matters too, 15 inches of overhang allows knees to tuck under without hitting cabinet faces.
Don’t forget to measure doorways and hallways if the island won’t fit through standard 32- or 36-inch interior doors. Some Home Depot islands ship in modular sections or require assembly, but larger stationary models may need professional delivery with furniture dollies or disassembly of door casings.
Consider how the island interacts with other design elements, particularly when browsing inspiration from comprehensive home design resources that showcase spatial planning strategies.
Installation Tips for Your Home Depot Kitchen Island
Portable islands need minimal setup, attach casters (if not pre-installed), level the unit using adjustable feet if included, and position it. Lock wheels once placed to prevent drift. For models with butcher block tops, apply food-grade mineral oil within 24 hours of unboxing to prevent warping and cracking.
Stationary islands require more prep. First, confirm the subfloor is level using a 4-foot level. Variations beyond 1/4 inch over 4 feet will cause wobbling. Shim the base cabinets as needed, most units include adjustable legs that thread up or down to compensate for uneven floors.
Anchor the island to the floor using L-brackets screwed into wall studs if the island backs up to a wall, or hurricane ties and construction adhesive if freestanding. This prevents tipping when children climb or heavy loads are applied to one side. Safety warning: Always wear safety glasses when drilling into tile or hardwood floors, bits can shatter, and debris flies unpredictably.
If adding electrical outlets, hire a licensed electrician unless you’re comfortable working with 120V wiring and local code. Running power to an island typically involves cutting a trench in the subfloor, installing conduit, and fishing wire from an existing circuit or a new dedicated breaker. DIY electrical work that doesn’t meet NEC standards can void homeowner’s insurance and create fire hazards.
Plumbing installation for sinks or dishwashers is even more complex. Vent stacks must rise above the roofline, and drainpipes require proper slope (1/4 inch per foot) to prevent clogs. Most jurisdictions require permits and inspections for plumbing modifications. Budget $500 to $1,500 for professional installation if adding water lines or drainage.
For countertop attachment, some Home Depot islands ship with tops separate from bases. Use construction adhesive rated for the materials involved (wood, stone, or laminate) and clamp overnight if possible. Avoid over-tightening screws through stone or quartz, use rubber washers to distribute pressure and prevent cracking.
Finish by caulking gaps between the island and flooring with color-matched silicone caulk. This seals against moisture and prevents crumbs from accumulating underneath. Allow caulk to cure for 24 hours before exposing to water.
Always keep the manufacturer’s assembly instructions and warranty documentation. Home Depot’s extended protection plans cover accidental damage on some models, but only if installation follows provided guidelines.