Table of Contents
ToggleHard water leaves its mark, literally. Scale buildup in pipes, soap scum on shower doors, dingy laundry, and appliances that die before their time. If this sounds familiar, a whole home water softener can solve these headaches at the source. Unlike point-of-use filters, a whole house system treats every drop that enters your home, protecting plumbing, improving efficiency, and making daily tasks easier. This guide covers how these systems work, how to choose the right one, and whether you can tackle installation yourself or need to call a pro.
Key Takeaways
- A whole home water softener removes hardness minerals like calcium and magnesium at the source, protecting plumbing and appliances from scale buildup more effectively than point-of-use filters.
- Salt-based ion exchange systems deliver true hardness removal for genuinely hard water (above 10 gpg), while salt-free conditioners work best as preventive maintenance in moderately hard water.
- Demand-initiated regeneration (DIR) is more efficient than timer-based systems, saving salt and water by regenerating only when needed based on actual usage.
- A whole home water softener requires matching grain capacity to household size and daily water usage—multiply daily usage by hardness level and add a 20% buffer for accurate sizing.
- Professional installation costs $300–$800 depending on complexity, though DIY installation is possible if you’re comfortable with plumbing work and local codes permit it.
- Monthly salt level checks, quarterly brine tank cleaning, and annual resin sanitization keep your water softener running efficiently and extend its lifespan from 10–15 years to 20+ years.
What Is a Whole Home Water Softener and How Does It Work?
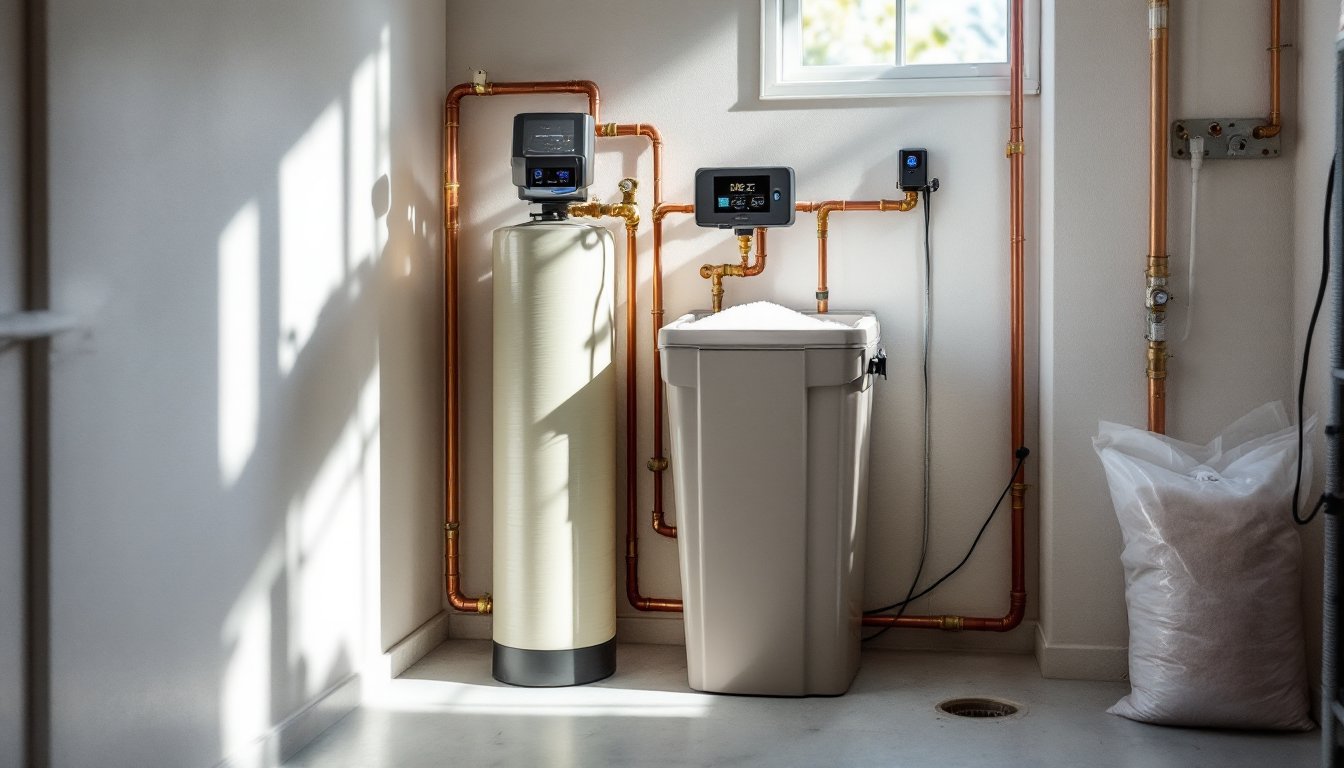
A whole home water softener is a treatment system installed on the main water line, typically in a basement, garage, or utility room. It removes hardness minerals, primarily calcium and magnesium, before water reaches fixtures, appliances, and taps throughout the home.
Most residential systems use ion exchange, a chemical process that swaps hardness minerals for sodium or potassium ions. Here’s the basic cycle:
- Hard water enters a mineral tank filled with resin beads charged with sodium ions.
- As water flows through, calcium and magnesium ions cling to the resin, releasing sodium in exchange.
- Softened water exits the tank and flows to your home’s plumbing system.
- Once the resin is saturated with hardness minerals, the system regenerates, flushing the beads with a brine solution from a separate salt tank, recharging them with sodium and washing away the minerals down the drain.
Regeneration can be time-based (on a schedule), demand-based (triggered by water usage), or manual. Demand-initiated regeneration (DIR) is more efficient because it only regenerates when needed, saving salt and water.
The system’s grain capacity determines how much hardness it can remove between regenerations. A typical household with moderately hard water (7–10 grains per gallon, or gpg) might need a 32,000–48,000 grain unit, depending on daily water usage and household size.
Signs Your Home Needs a Water Softening System
Hard water is common but often goes undiagnosed until the damage piles up. Watch for these telltale signs:
- White, chalky buildup on faucets, showerheads, and inside appliances like coffee makers or dishwashers. This is limescale, solidified calcium and magnesium.
- Soap that won’t lather or leaves a film on skin and hair. Hard water reacts with soap to form insoluble residue instead of suds.
- Dull, stiff laundry even after washing. Mineral deposits cling to fabric fibers.
- Spots on glassware and dishes after running the dishwasher, caused by mineral-rich rinse water.
- Reduced water pressure or clogged aerators. Scale narrows pipe diameter and clogs screens.
- Shortened appliance lifespan. Water heaters, washing machines, and dishwashers work harder and fail sooner when coated in scale.
- Itchy, dry skin after showers. Hard water strips natural oils and leaves mineral residue.
You can confirm hard water with an inexpensive test kit (available at hardware stores) or send a sample to a local water testing lab. Results are reported in grains per gallon (gpg) or parts per million (ppm). Water above 7 gpg (120 ppm) is considered hard: above 10.5 gpg is very hard and warrants treatment.
Types of Whole House Water Softeners: Which One Is Right for You?
Not all water softeners work the same way. The two main categories are salt-based and salt-free, with meaningful trade-offs.
Salt-Based vs. Salt-Free Water Softeners
Salt-based (ion exchange) softeners are the gold standard for actually removing hardness minerals. They require regular salt refills (typically 40-lb bags of sodium chloride or potassium chloride every 4–8 weeks, depending on usage). These systems need a drain connection for the brine discharge during regeneration and a power outlet for the control valve.
Pros:
- True hardness removal, measured results, not just conditioning
- Prevents scale buildup in pipes and appliances
- Noticeably softer water for cleaning, bathing, and laundry
- Established technology with decades of reliability
Cons:
- Adds sodium to drinking water (typically 20–40 mg/L per gpg of hardness removed)
- Ongoing salt and water costs
- Requires maintenance and monitoring
- Banned in some municipalities due to brine discharge concerns
Salt-free conditioners (also called descalers or TAC systems, template-assisted crystallization) don’t remove minerals. Instead, they alter the structure of calcium and magnesium so they’re less likely to form scale. No salt, no drain, no electricity.
Pros:
- Low maintenance and eco-friendly
- No sodium added to water
- No regeneration cycle or wastewater
Cons:
- Don’t actually soften water, minerals remain in solution
- Less effective on very hard water (above 15 gpg)
- Won’t improve soap lather or skin feel
- Performance varies by water chemistry
For genuinely hard water (above 10 gpg), a salt-based ion exchange system delivers measurable results. Salt-free conditioners work best as preventive maintenance in moderately hard water or where sodium addition is a concern.
Key Features to Look for When Buying a Whole Home Water Softener
Choosing a water softener isn’t just about capacity. Focus on these practical features:
- Grain capacity matched to household size and hardness level. Multiply daily water usage (average U.S. household: ~80–100 gallons per person per day) by water hardness in grains to estimate daily grain demand. Add a 20% buffer.
- Demand-initiated regeneration (DIR) instead of timer-based. DIR systems monitor actual usage and regenerate only when needed, saving salt and water.
- High-efficiency resin or dual-tank designs for continuous soft water. Single-tank systems go offline during regeneration (usually 1–2 hours, typically at night).
- Flow rate (GPM) sufficient for peak demand. A family of four typically needs 10–12 GPM to handle simultaneous showers, dishwasher, and washing machine use without pressure drop.
- Digital control valve with clear readouts for salt level, regeneration schedule, and troubleshooting codes.
- NSF/ANSI Standard 44 certification for performance and material safety.
- Bypass valve for maintenance, repairs, or watering the lawn (to avoid wasting treated water).
- Salt efficiency rating. Look for systems using 6–8 lbs of salt per regeneration rather than 10+.
- Warranty length and coverage. Quality units carry 5–10 year warranties on the tank and 1–3 years on electronics.
Comparing whole-house water softeners side by side helps identify which features justify a higher price point and which are marketing fluff.
Installation Options: DIY vs. Professional Setup
Installing a whole home water softener involves cutting into the main water line, adding drain and overflow connections, and running power to the control valve. It’s a plumbing project, not just setting up an appliance.
DIY installation is possible if you’re comfortable with:
- Shutting off the main water supply and draining the line
- Cutting copper, PEX, or galvanized pipe and making watertight connections (soldering, compression fittings, or SharkBite-style push-to-connect)
- Installing a loop or dedicated space on the main line after the meter but before the water heater and branch lines
- Running a drain line (1/2″ or 3/4″) with an air gap to a floor drain, sump, or standpipe (check local codes, some areas require backflow prevention)
- Providing a grounded 120V outlet within 6 feet of the unit
Most softeners come with installation kits including bypass valves, connectors, and tubing. Budget 4–6 hours for a first install, including prep and testing.
When to hire a pro:
- You’re not confident working with pressurized plumbing
- Local codes require a licensed plumber for water line modifications or backflow prevention devices
- The main line is in a tight crawl space or requires rerouting
- You have PVC supply lines (common in warmer climates) and need specialized solvents and cure times
Professional water softener installation costs typically range from $300 to $800 depending on complexity, regional labor rates, and whether new drain or electrical lines are needed. Get at least two quotes and confirm what’s included (haul-away of old equipment, permits, testing).
Safety notes: Always wear safety glasses when cutting pipe. Turn off power at the breaker before working near electrical outlets. Test all connections under pressure before walking away, small leaks become big problems fast.
Maintenance Tips to Keep Your Water Softener Running Efficiently
A water softener is low-maintenance, but neglect will cost you in efficiency and repairs. Stick to this routine:
Monthly:
- Check salt level in the brine tank. Keep it at least one-quarter full but no more than two-thirds (overfilling can cause bridging, where a hard crust forms above wet salt, preventing proper brine formation).
- Inspect for salt bridges or mushing. Tap the salt with a broom handle: it should give way easily. If it’s solid, break it up. Mush (sludge at the bottom) should be scooped out.
Every 3–6 months:
- Clean the brine tank. Empty it, scrub the sides with warm soapy water, rinse thoroughly, and refill with fresh salt.
- Check and clean the venturi valve and screen (located in the control head). Sediment clogs reduce brine draw and prevent regeneration. Follow the manual, most twist off by hand.
Annually:
- Sanitize the resin tank. Pour 1/2 cup of bleach or a commercial resin cleaner into the brine well and run a manual regeneration cycle. This kills bacteria and flushes accumulated iron or sediment.
- Test water hardness with a kit to confirm the system is still performing. If hardness creeps up, regeneration frequency or salt dose may need adjustment.
- Inspect hoses and fittings for leaks, cracks, or corrosion.
Salt choice matters. Use solar salt pellets or evaporated salt pellets, they’re purer and leave less residue than rock salt. Potassium chloride is a sodium-free alternative, though it costs roughly double and may require adjusting the controller.
Avoid common mistakes: Don’t let the salt level drop to empty, it can take multiple regenerations to recover. Don’t use water during regeneration unless you have a twin-tank system. And never bypass the softener for long periods without running a regeneration cycle first: stagnant resin can harbor bacteria.
Routine care takes 10 minutes a month and extends system life from 10–15 years to 20+ with proper attention.